Thursday, 1 June 2017

Cornucopia Corner


Hello........  Today I thought I'd share with details of a new feature I'm am thinking of bringing to the blog.  I had thought about settling up a completely new blog called 'Cornucopia Corner' but with my health being so poor I just don't think I have the energy, so for now I think I'm just going to trial it out at the Summerhouse, after all the Summerhouse by the sea is about my life and every day goings on.


So what are these posts going to be about, well all sorts things really, Mind Body and Spirit, things that I find helpful with my healing journey, well being posts, meditation, Food, and Spiritual matters.

I'm still going to continue with the usual Summerhouse stuff,  I appreciate this might not be every ones cup of tea or reason for visiting the Summerhouse, so I'd love to hear you're thoughts and comments on this,  but for now what I'll do is always add Cornucopia Corner to the title of relevant posts, so if you want to you can skip over them.


You see for the past year I've been on a bit of Spiritual journey, that as of yet I'm still struggling to understand,  I've not really spoken about it on here, although I have share a few pics over on instagram.  So it would be great to talk about it here a little more.


 Finally why Cornucopia Corner, well my answer is I'm not entirely sure !!  the name and image came to me during meditation and when I looked up it's meaning....

'An abundant supply of good things'

Well it seemed kind of perfect.
Clare xx


Friday, 19 May 2017

Pixie House Bag


Hello............... Sorry it's been so long since my last post, but this year has not been going so great for me health wise.  Never less I'm here to share a bit of crafty goodness today.  This is another of the items I made for our craft clubs exhibition back in February, I can't believe it's now May and it's taken me so long to get around to sharing this make with you.


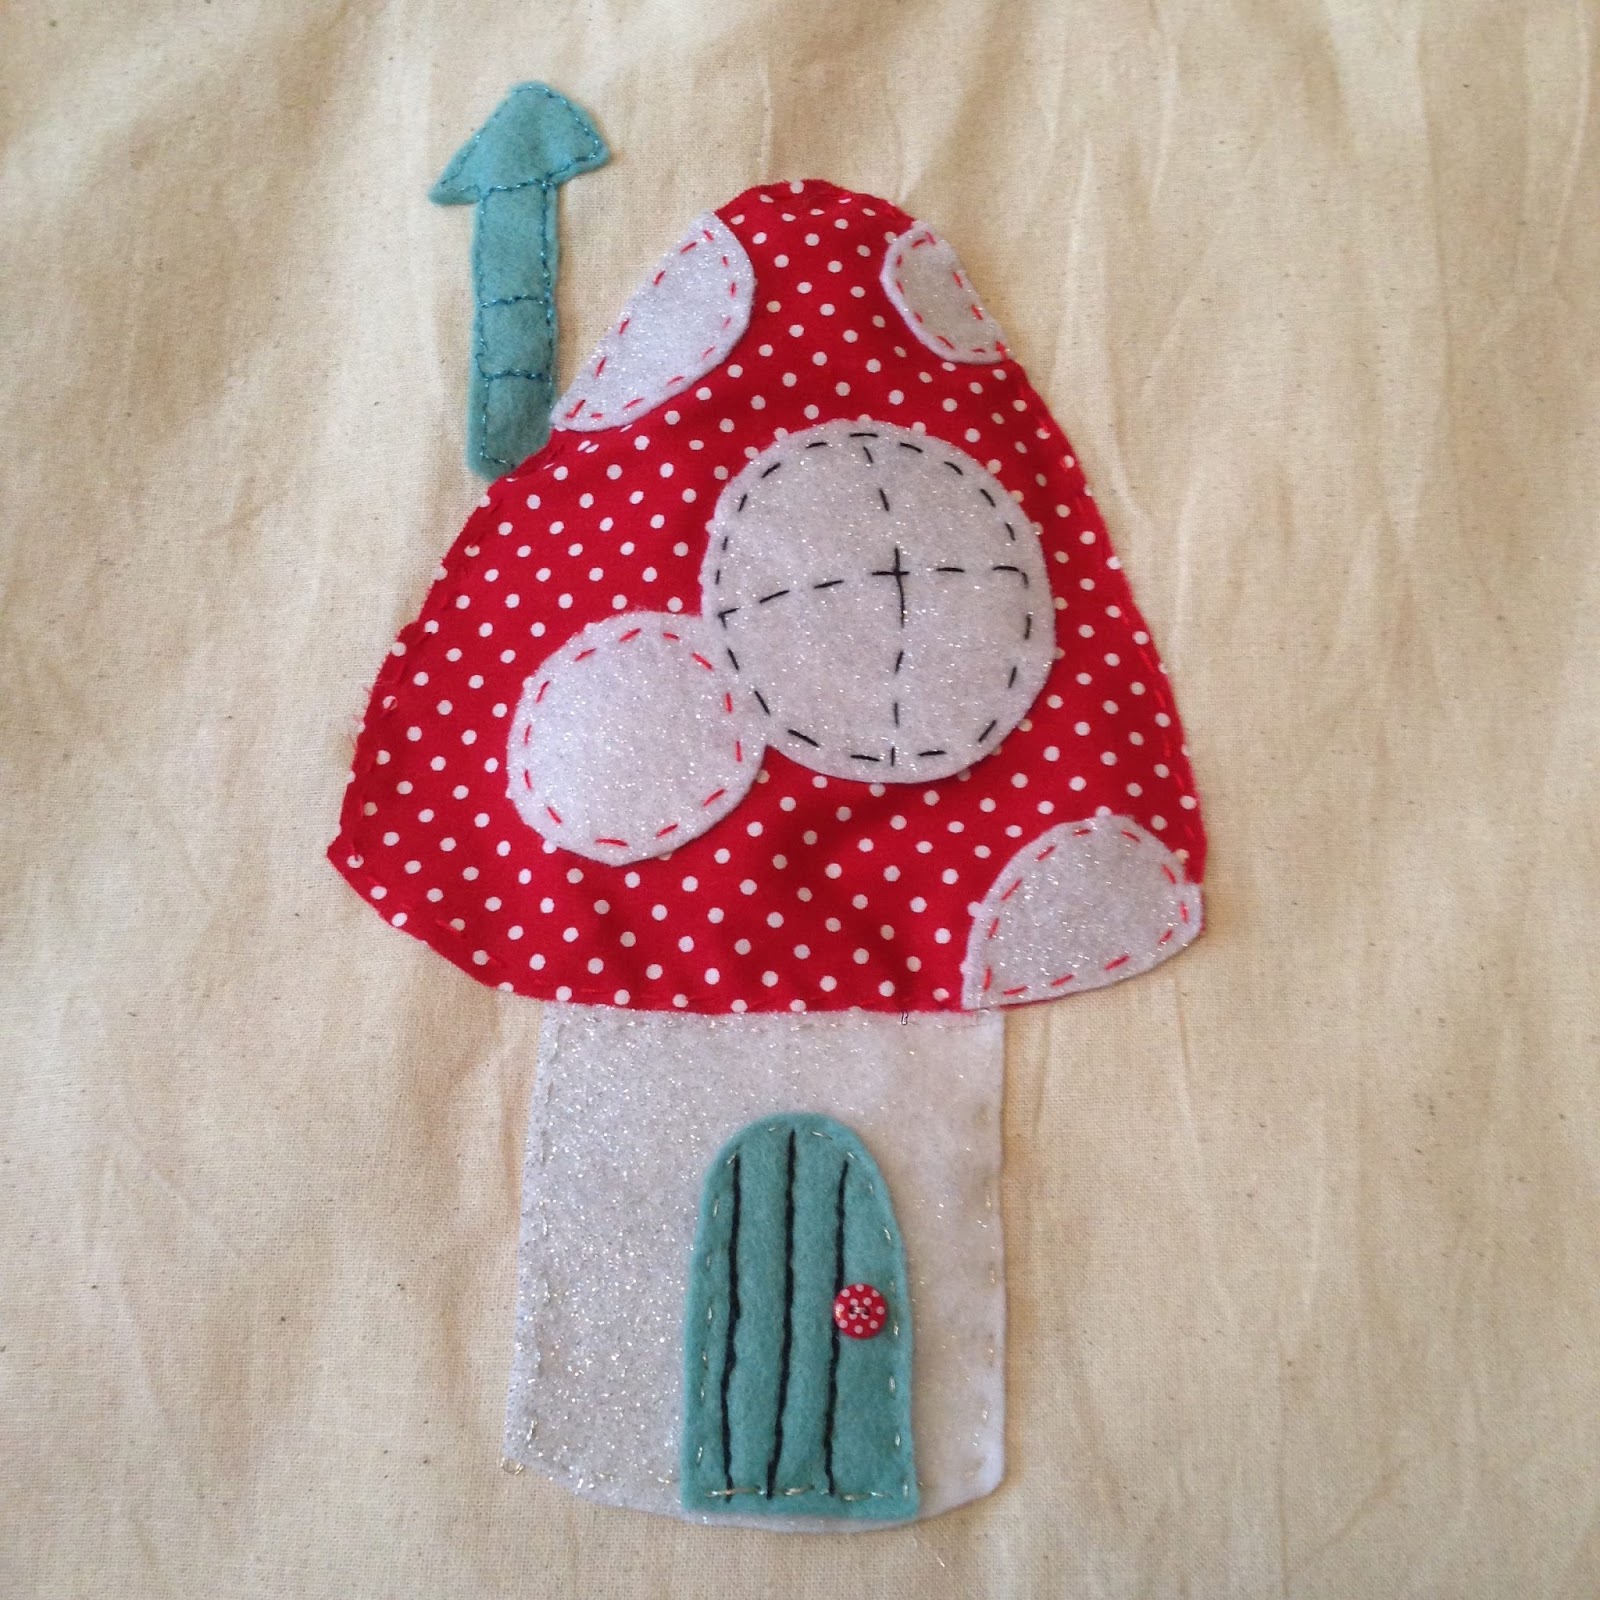
For this make I decided to decorate a calico shopping bag, with a cute little toadstool house, the template for the house comes from 'Doodle Stitching' by Aimee Ray, the book comes with a handy CD with all the Motifs on and I just enlarged it until I had the right size house to fit my shopping bag. 


For the main part of the house I decided on felt as it doesn't fray and well mainly as I had this lovely white glitter felt in my stash that just screamed pixie house, I also used some pretty duck egg blue natural felt for the door, then it was just a case of stitching it all together with embroidery floss, I used silver and then decorated the door with a split stitch in black thread to look likes boards before adding a cute little button for the door handle.

Oh how I love how may bag sparkles in the sunshine !!


I then cut a piece of red polka dot fabric for the mushroom top and cut some more glitter felt to make the spots


Stitching them in place, I added in the little window with some more black thread.


I then cut my little house a chimney out of the same duck egg felt and then pinned all the pieces to my shopping bag.


I decorated and stitched in place the chimney with blue metallic floss making sure the chimney was tucked in neatly under the mushroom.


Before stitching the rest of the mushroom to the bag I added a tiny bit of stuffing, not too much !! to make the mushroom a little bit puffy, then after a bit more stitching I was done.


Ta-Dah
 One cute little Pixie house. 


Here's it is on display at the exhibition.

Happy Crafting

Clare xxx


Sunday, 23 April 2017

Butterfly hoop


Hello.............. Today I'm going to share with you another make I made for our Craft Club exhibition back in February.  This was a bit of a last minute make to fit the woodland theme.  I had planned on doing a embroidery in the hoop but with my health being so bad I just ran out of time.


So first up I selected some pretty fabric and ribbon from my stash and using bondaweb ironed it onto some linen.


Before popping it into a hoop.


I then found these pretty butterflies in my card making stash and at that point all thought of embroidering some flowers went straight out the window as I so needed a sparkly butterfly hoop in my life.  The butterflies I think are made of acetate and are sooo lovely, they have glitter and delicate sparkles with pretty pearl beads and wire.
 

I then decide to add a little colour behind my butterflies


 Using some felt to make them 3d, the pink butterfly is die cut but for the blue one I decided to wing it with the wings !!!! just cutting out a simple butterfly shape free hand.


I then did some actual sewing !!! to hold the felt butterflies in place before topping them with the sparkly butterflies using glue dots.


Almost done I wrapped some turquoise lace around the outside of the hoop holding it in place with double sided sticky tape, yes this is a very Blue Peter make.


Now as for the back having never made a wall mounted hoop before, I wasn't quite sure what to do,  I'm sure there is a proper way to do this, but I didn't know what it was, so I just tacked around the  fabric to gather it all in before cutting off the excess.


I then cut a paper plate to size to cover the back and glued it in place.


Ta-Dah

I love how my sparkly butterfly hoop turned out and can't wait to hang it on the wall.
Happy Crafting 

Clare xx

Thursday, 30 March 2017

Crocus Love


Hello........... This year the Crocuses have been just fabulous here at the Summerhouse, they may have come up a little later than usual, but boy have they been beautiful.


It all started with just one or two, the cream and white kind always seem to come up first.


Then we had the clumping together kind


of some many lovely colours.


The dainty kind


that seem almost ethereal


just look at the colours when they open up to the sun, so magical.


We've also had the growing up through the grass under the tree kind, 


Lovely to see them popping they're heads up through the grass


and just look at those stripes.


Don't you just love the stripy kind? ............

Me well, I love them all

Clare xx


Monday, 13 March 2017

Pine Cone Fairies


Hello........... I have a fun make to share with you today, one of the themes for our craft club exhibition is Fairies and I just could'nt resist having a go at making some from pine cones.


The idea kind of mushroomed from the Magic wool fairies book I have by Christine Schafer, I made my first felted fairy 'here' last summer and since then with relapses I've not really got any further with felting, but when I found some pine cones in the Christmas box inspiration hit, Pine cone fairies !!!! I just needed to make some,  I  had some wooden heads, pipe cleaners and sequins in my stash and a idea what more could I need.....


Well the answer to that it turns out is lots and lots of different glues, as I discovered it really hard to get things to stick to pine cones after a lots of trail and error I finally used lock tight super glue and even then some fairy decapitations still happened eek !!!!


Once the head was on I made some pine cleaner arms and added pretty beads to each end for my fairies hands.


The arms were much easier to attach as you can just bend them around and through the cones and they stay in place.  I then used pva to glue some felt hair to my fairies head, I knotted it in the middle using baker twine to make a hanging loop, now you really have to wait quite a while for the glue to dry at this stage, if not you risk a bald headless fairy situation. !!!


I then added a pretty flower to cover the knot in the bakers twine and set about styling my fairies hair


Next up I used some leaf sequins to make some sparkly wings I used glue dots to gradually build up the wings, then I had the same old problem of what sticks to a pine cone ? as the surface is so uneven, this time I used sticky foam pads to build up a flat surface.


and thankfully that was enough to hold the wings in place.


Ta-Dah
Fairy number one 


I then decided to make a male fairy giving him a wizard like beard and pointy felt hat


I made him a larger set of wings and this time I wrapped the pipe cleaner arms in some silver sparkly yarn.


Ta-Dah

Isn't he a cutie, I love how much personality these little fairies have.


Last up I made a purple fairy, this time I made her some pretty paper wings with added sparkles I also wrapped some ribbon around the cone and added extra sparkles.


These fairies really are a lot of fun to make, after a bit of hairstyling my final fairy was ready.


Ta-Dah

So all my fairies are now on display in the local library and I was pleased to discover today that they all still have there heads, I did a bit of head testing at home before hand as I was a bit worried that the heads might come off and scare the children I envisaged going into the library and finding 3 severed fairy heads hanging on the branches and all the bodies fallen to the ground yikes............


But it was all OK, here they all are safe and sound hanging out with some woodland friends.

Happy Crafting

Clare xx