Showing posts with label Crafts. Show all posts

Wednesday, 28 June 2017

Work in Progress Wednesday


Hello........... How are you? Today I thought I'd write a bit of a catch up post, as well life seems to be one big work in progress at the moment and I guess that's what it should be.


My crafting assistants are growing up fast, well I think they are every time someone comes to the house they say how much they have grown, being here with them every day we're not noticing it so much.  They are bundles of fun and full of energy so not a lot of crafting is getting done.


I did manage a tiny bit at the weekend as I went over to stay at my sisters, above is Monty on the top of my bag, it was either a case of 'don't leave' or 'can I come too'.


 While there I took the opportunity to do a little crochet.


Working on my Rainbow Drops Blanket.


Here's a pic of our little Alfie, aka (piglet) who is smaller than his brother but catching up fast, he eats twice as much as the other one.


The crystals I selected for this week are a mix of blues and green, so pretty, blue is mostly linked to the throat chakra and green the heart.


Mostly I've been carrying around this blue chalcedony, it's such a pretty colour I knew it had to be in the mix this week as I had a dream about this very stone, shape, colour a exact match, I'd forgotten I even had it, I have several storage crates containing crystals, so in the morning I went and had a look and found it there.  Weird but I'm going with it.


So craft assistant Alfie asks 'What you Doing'


Well, as you know not to much at the moment but I do have this lovely charm pack that I'm hoping to turn into a table runner when I get a mo, I'm hoping to have a play around with the colour and layout today, when you pair are having a sleep.


Aww they are so cute when they are sleeping.


Alfie even likes  to hold onto you're thumb while alseep, which is lovely but sure does slows down the crocheting.

What are you making at the mo ?

Happy Crafting

Clare xx

Friday, 19 May 2017

Pixie House Bag


Hello............... Sorry it's been so long since my last post, but this year has not been going so great for me health wise.  Never less I'm here to share a bit of crafty goodness today.  This is another of the items I made for our craft clubs exhibition back in February, I can't believe it's now May and it's taken me so long to get around to sharing this make with you.


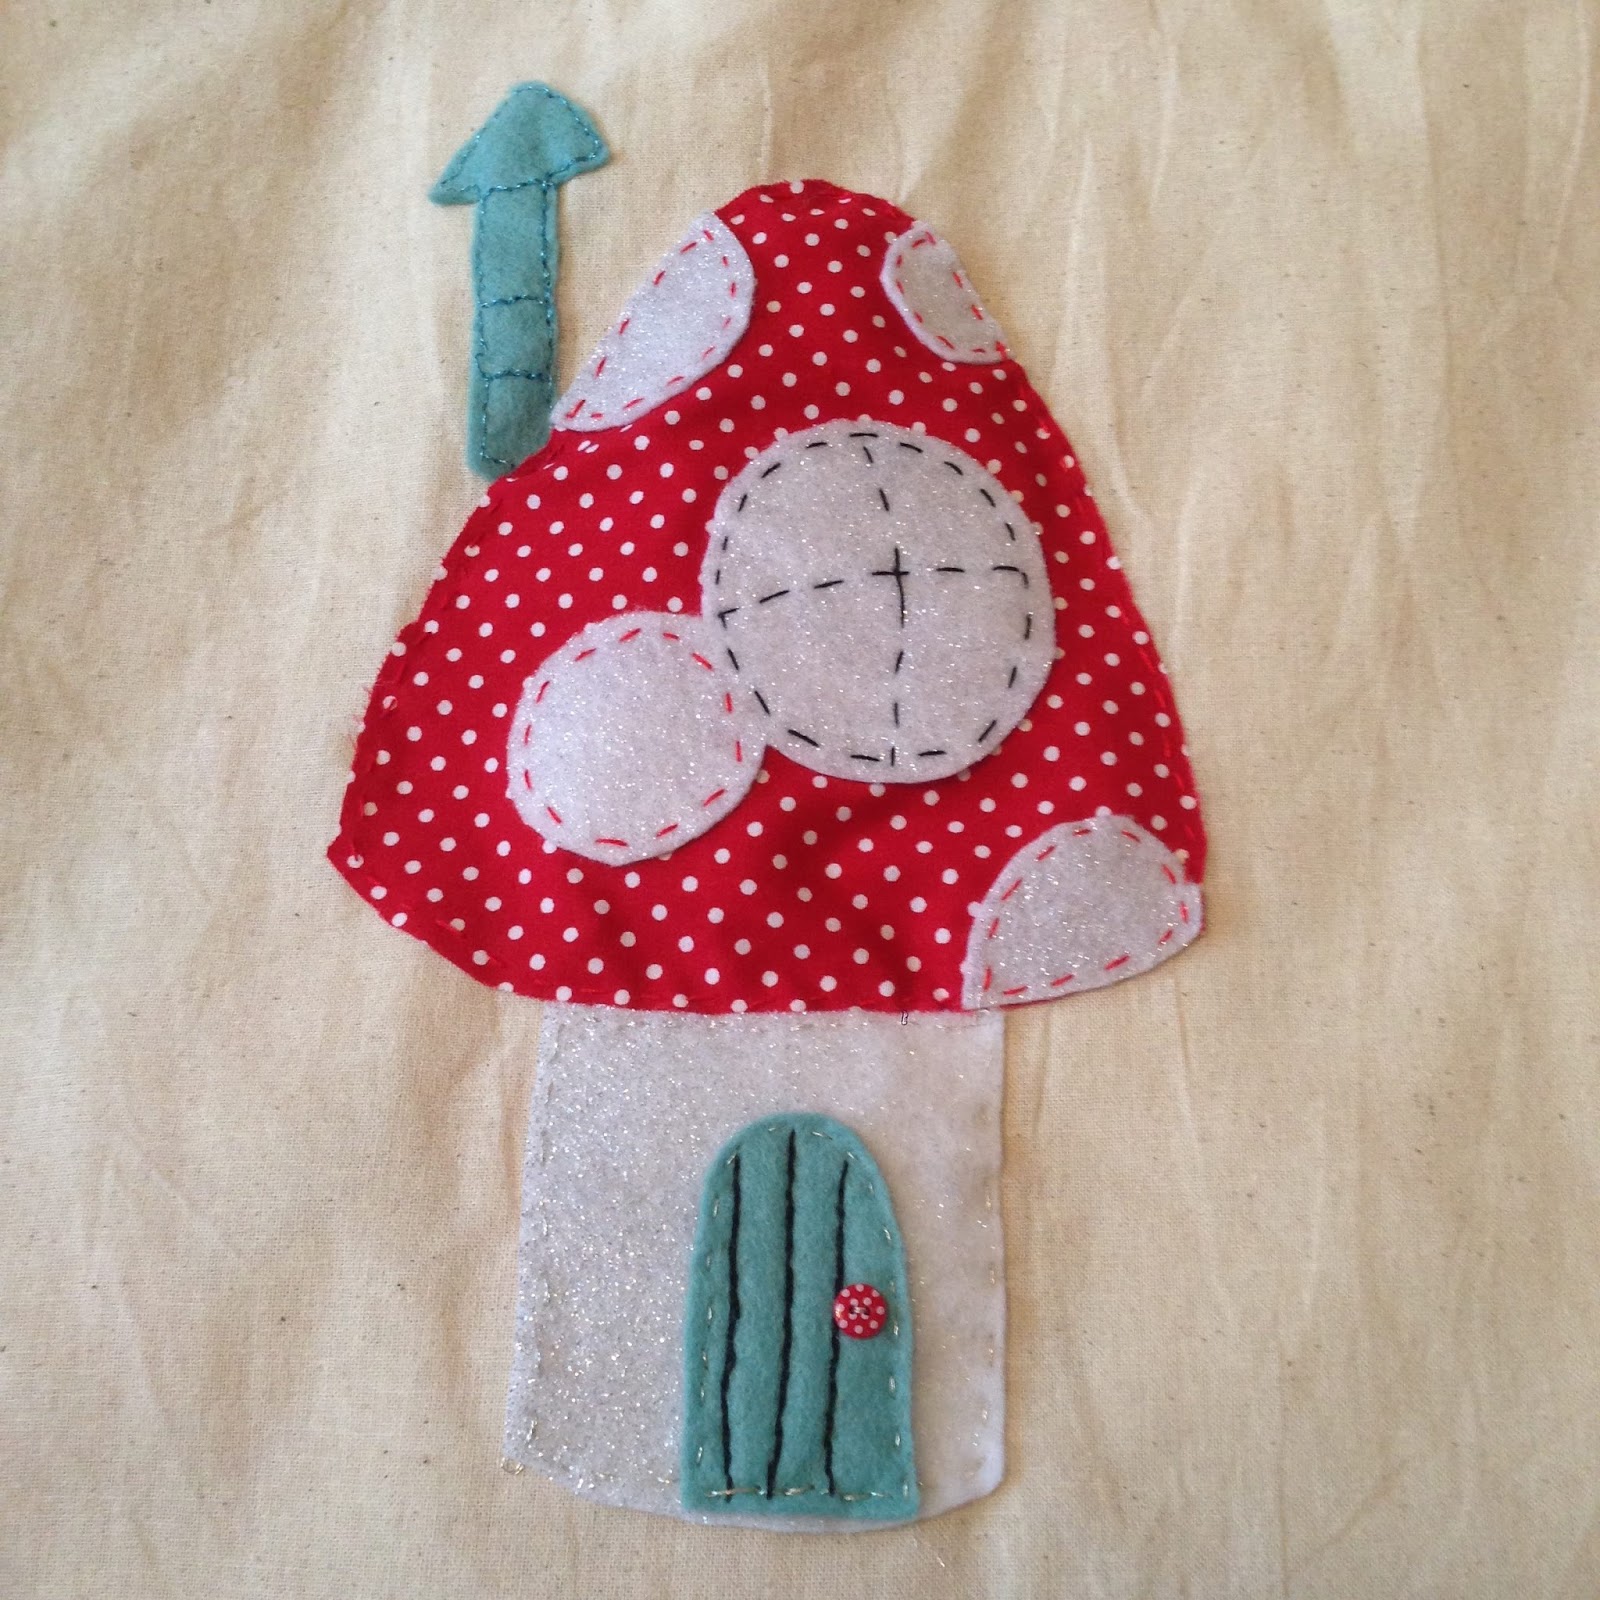
For this make I decided to decorate a calico shopping bag, with a cute little toadstool house, the template for the house comes from 'Doodle Stitching' by Aimee Ray, the book comes with a handy CD with all the Motifs on and I just enlarged it until I had the right size house to fit my shopping bag. 


For the main part of the house I decided on felt as it doesn't fray and well mainly as I had this lovely white glitter felt in my stash that just screamed pixie house, I also used some pretty duck egg blue natural felt for the door, then it was just a case of stitching it all together with embroidery floss, I used silver and then decorated the door with a split stitch in black thread to look likes boards before adding a cute little button for the door handle.

Oh how I love how may bag sparkles in the sunshine !!


I then cut a piece of red polka dot fabric for the mushroom top and cut some more glitter felt to make the spots


Stitching them in place, I added in the little window with some more black thread.


I then cut my little house a chimney out of the same duck egg felt and then pinned all the pieces to my shopping bag.


I decorated and stitched in place the chimney with blue metallic floss making sure the chimney was tucked in neatly under the mushroom.


Before stitching the rest of the mushroom to the bag I added a tiny bit of stuffing, not too much !! to make the mushroom a little bit puffy, then after a bit more stitching I was done.


Ta-Dah
 One cute little Pixie house. 


Here's it is on display at the exhibition.

Happy Crafting

Clare xxx


Sunday, 23 April 2017

Butterfly hoop


Hello.............. Today I'm going to share with you another make I made for our Craft Club exhibition back in February.  This was a bit of a last minute make to fit the woodland theme.  I had planned on doing a embroidery in the hoop but with my health being so bad I just ran out of time.


So first up I selected some pretty fabric and ribbon from my stash and using bondaweb ironed it onto some linen.


Before popping it into a hoop.


I then found these pretty butterflies in my card making stash and at that point all thought of embroidering some flowers went straight out the window as I so needed a sparkly butterfly hoop in my life.  The butterflies I think are made of acetate and are sooo lovely, they have glitter and delicate sparkles with pretty pearl beads and wire.
 

I then decide to add a little colour behind my butterflies


 Using some felt to make them 3d, the pink butterfly is die cut but for the blue one I decided to wing it with the wings !!!! just cutting out a simple butterfly shape free hand.


I then did some actual sewing !!! to hold the felt butterflies in place before topping them with the sparkly butterflies using glue dots.


Almost done I wrapped some turquoise lace around the outside of the hoop holding it in place with double sided sticky tape, yes this is a very Blue Peter make.


Now as for the back having never made a wall mounted hoop before, I wasn't quite sure what to do,  I'm sure there is a proper way to do this, but I didn't know what it was, so I just tacked around the  fabric to gather it all in before cutting off the excess.


I then cut a paper plate to size to cover the back and glued it in place.


Ta-Dah

I love how my sparkly butterfly hoop turned out and can't wait to hang it on the wall.
Happy Crafting 

Clare xx

Monday, 13 March 2017

Pine Cone Fairies


Hello........... I have a fun make to share with you today, one of the themes for our craft club exhibition is Fairies and I just could'nt resist having a go at making some from pine cones.


The idea kind of mushroomed from the Magic wool fairies book I have by Christine Schafer, I made my first felted fairy 'here' last summer and since then with relapses I've not really got any further with felting, but when I found some pine cones in the Christmas box inspiration hit, Pine cone fairies !!!! I just needed to make some,  I  had some wooden heads, pipe cleaners and sequins in my stash and a idea what more could I need.....


Well the answer to that it turns out is lots and lots of different glues, as I discovered it really hard to get things to stick to pine cones after a lots of trail and error I finally used lock tight super glue and even then some fairy decapitations still happened eek !!!!


Once the head was on I made some pine cleaner arms and added pretty beads to each end for my fairies hands.


The arms were much easier to attach as you can just bend them around and through the cones and they stay in place.  I then used pva to glue some felt hair to my fairies head, I knotted it in the middle using baker twine to make a hanging loop, now you really have to wait quite a while for the glue to dry at this stage, if not you risk a bald headless fairy situation. !!!


I then added a pretty flower to cover the knot in the bakers twine and set about styling my fairies hair


Next up I used some leaf sequins to make some sparkly wings I used glue dots to gradually build up the wings, then I had the same old problem of what sticks to a pine cone ? as the surface is so uneven, this time I used sticky foam pads to build up a flat surface.


and thankfully that was enough to hold the wings in place.


Ta-Dah
Fairy number one 


I then decided to make a male fairy giving him a wizard like beard and pointy felt hat


I made him a larger set of wings and this time I wrapped the pipe cleaner arms in some silver sparkly yarn.


Ta-Dah

Isn't he a cutie, I love how much personality these little fairies have.


Last up I made a purple fairy, this time I made her some pretty paper wings with added sparkles I also wrapped some ribbon around the cone and added extra sparkles.


These fairies really are a lot of fun to make, after a bit of hairstyling my final fairy was ready.


Ta-Dah

So all my fairies are now on display in the local library and I was pleased to discover today that they all still have there heads, I did a bit of head testing at home before hand as I was a bit worried that the heads might come off and scare the children I envisaged going into the library and finding 3 severed fairy heads hanging on the branches and all the bodies fallen to the ground yikes............


But it was all OK, here they all are safe and sound hanging out with some woodland friends.

Happy Crafting

Clare xx

Tuesday, 31 January 2017

Angels Wings and Sparkles


Hello............  I make no apologies for today's post it's going to be photo heavy and all about colour and sparkle, with a tiny public service announcement. I am now five weeks into a horrible lurgy here at the summerhouse and I'm feeling terrible, so it's colour therapy all the way today.

That's the trouble with chronic illnessis a healthy person gets ill with a cold or virus and they bounce back in a week or so, not so much people like me with a complex chronic illness, yes five weeks on my cold has now finally broken but for the first few weeks my immune system just didn't have a clue what to do, it had immune response's just not the right ones it attacked my joints it made by ME/Lyme disease flare to the point I couldn't get out of bed and has probably put me in a relapse that will take months to recover from, it also decided to attack some of the nerves in my face leaving me in awful pain and it disturbed by autonomic nervous system, so much my heart spent 11 and half hour in tachycardia one day last week.

So this is a very polite ask on behalf of all the people you may know with a chronic illness, please if you have a virus or a cold or any other bug, please please think before seeing them and stay away as it could make them very ill for a long long time.

OK sorry rant over.. back to the colour


Awww


Isn't it lovely


I think I mentioned in my first post I'm using Rico Creative Reflection for my shawl


and I'm loving how it's turning out.


It's a fine yarn so it's taking me a while but it's a real pleasure


to work with these sparkly colours


they make my heart sing, one very happy Clare


Still a long way to go, but here's where I'm up to so far...........

Happy Crafting

Clare xx